Adding an Article
Adding a new article is easy and takes just a few steps. Here’s how to do it:
1. Log in to WordPress
Section titled “1. Log in to WordPress”Go to the login page for the Think Wellbeing site and enter your username and password.
👉 If you’re unsure how to log in, see the Logging in guide.
2. Click “Add New Article”
Section titled “2. Click “Add New Article””Once logged in:
- Look in the left-hand menu for Knowledge Hub (this is what WordPress usually calls “Posts”).
- Hover over it and click Add New Article.
3. Add your content
Section titled “3. Add your content”Now you’ll see the article editor. Here’s what to fill in:
- Title: Keep it short, clear, and meaningful.
- Main text: Use the big box to write or paste your article content.
- Categories: On the right-hand side, choose a category (e.g. Insights, Must Read).
📸 Featured Image
Section titled “📸 Featured Image”Scroll down or look to the right-hand side for the Featured Image box. This image will be shown in cards, previews, and on the article page — so make it count!
We use the Instant Images plugin to give you access to a wide range of high-quality stock photos.
Here’s how to add a featured image:
- In the Featured Image box, click Set featured image.
- A media panel will open. You have three main options:
- Media Library: Choose an image you’ve already uploaded.
- Upload Files: Drag in a new image or click Upload to add one from your computer.
- Instant Images: This tab gives you access to free stock photos from services like Unsplash.
To use Instant Images:
- Click the Instant Images tab.
- Either browse by collection or enter keywords in the search bar to find a suitable image.
- When you find one you like, click it.
- After a few seconds,WordPress will import the image and automatically select it for you. Click Set Featured Image.
Once selected, you’ll return to the editor and see the image now set as the featured image.
Hover over the image and buttons will appear to Replace or Remove it.
✏️ Excerpt (Summary)
Section titled “✏️ Excerpt (Summary)”Under the featured image, click the small link that says Add an excerpt…. This opens a box where you can write a short summary of the article. This is what appears in card previews across the site.
Once you’ve added it, click anywhere outside the box to save. The summary will then appear beneath the featured image, along with an Edit link you can use to make changes later.
4. Preview and publish
Section titled “4. Preview and publish”You can preview your article by clicking the Preview button near the top.
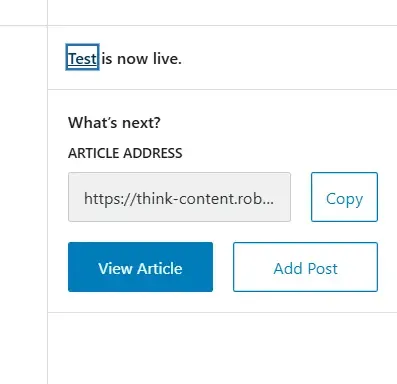
When you’re ready, click Publish to make it live.
✨ The website will automatically update a few minutes after publishing.
5. Scheduled publishing (optional)
Section titled “5. Scheduled publishing (optional)”If you want the article to go live at a later date:
- In the Publish box, click the date next to “Immediately”.
- Choose the date and time you’d like it to go live.
- Click Schedule instead of Publish.
The site will be updated automatically when the time comes.
6. View the article
Section titled “6. View the article”Wordpress will offer to take you to see the article live, but this won’t work for us as the site isn’t built in Wordpress, we’re just using the admin area. To view the article you will need to navigate to it manually.
Once you’re done, use the button in the top left of the screen to go back:

Need help? Just ask.